Oak Table Makeover
- dustrevival
- Jul 13, 2021
- 3 min read
Updated: Sep 11, 2021
I received text a couple months ago from a former client's mom. She explained she had an older oak table that she was giving away and was wondered if I would like to restore it for Dust Revival. She was excited to help support the cause of Dust Revival (10% of profits go to fight trafficking and/or alternatives for women in the adult entertainment industry - for more information, check out the About tab on the Dust Revival home page). Here are the before pictures of the table and chairs.
The table had a few cracks in the top and the finish was peeling, but overall, it was in pretty good condition. Lately, I have really been liking the natural wood look and I wanted this table to have that natural feel on the top. I got to work sanding the top and filling in the cracks with stainable wood filler.
The first picture shows the leaf before and the table after. The wood underneath was a beautiful solid oak. Please ignore the shade from the tree, it was too hot to move everything. Here is a quick tip: when filling with wood filler, use a plastic putty spreader and over fill any gaps. You can sand it down after it dries.
I cleaned the chairs with Simple Green and then sanded out the scratches and imperfections. I decided to paint the chairs, so I made sure everything was clean and did a light sand all over so the paint would adhere to the wood.
I have been working on a mixture of stains that would produce a natural wood look. I thought I had it figured out but previously worked on pine wood and not oak. I tried out special walnut first and the orange color of the wood really pulled through (picture #1) - not what I was going for. Next, I tried a white stain with a weathered gray stain on top (picture #2). I really liked the results, but wanted the top even lighter, so I did a white wash (white chalk paint with a lot of water added to it. I applied the wash with a brush and then wiped it off. This is what I was looking for (picture #3 - the left side is the white wash and the right side is the white stain and weathered gray stain. I finished the table with two layers of matte Polyacrylic and then finishing wax.
I love painting chairs with Rust-Oleum 2x Ultra Cover. It leaves a smooth, durable finish. I used it on the chairs of my own kitchen table and they have held up very well. It takes at least two coats per chair and don't forget to turn the chair over and spray again - you will be surprised at what you missed! After the chairs are completely coated, lightly sand them with a paper bag - yes, a paper bag. I recently learned this trick and it works perfectly! After the chairs dried, I applied at least three layers of spray Polyurethane, sanding in between coats with the brown paper bag.
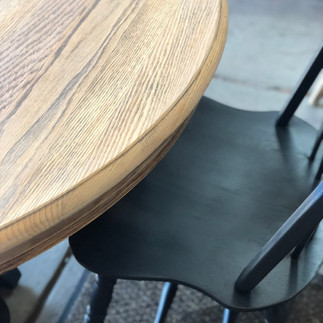
And, here is the finished product. I love it! The table has three leaves and two of them can be stored inside the center of the table underneath. The table will seat up to 8 people. I only have 6 chairs, but I found a bench today, refinished it. I will post updated pictures soon!


Comments